
Choosing new flooring transforms the character of any space, but a successful installation takes more than just picking out a pretty pattern. It’s a project that demands careful planning, clear decisions, and a willingness to dive into the details. Whether you’re refreshing a cozy bedroom or revamping a bustling kitchen, every stage sets the tone for the end result.
Understanding Your Flooring Needs
Every room tells its own story, and the flooring you select should be ready for the action. Before you get lost in swatches and samples, take a closer look at how the space will be used.
Assessing Room Function and Traffic
The first step is to map out the demands of each area. High-traffic zones like entryways or living rooms call for resilient options that can withstand the daily stampede. In contrast, a guest bedroom or home office might only need something comfortable and stylish. Moisture-prone spots such as bathrooms or laundry rooms require materials that shrug off spills and humidity without warping or staining.
Choosing the Right Flooring Type (Hardwood, Tile, Laminate, etc.)
Once you know your room’s needs, match them to suitable materials:
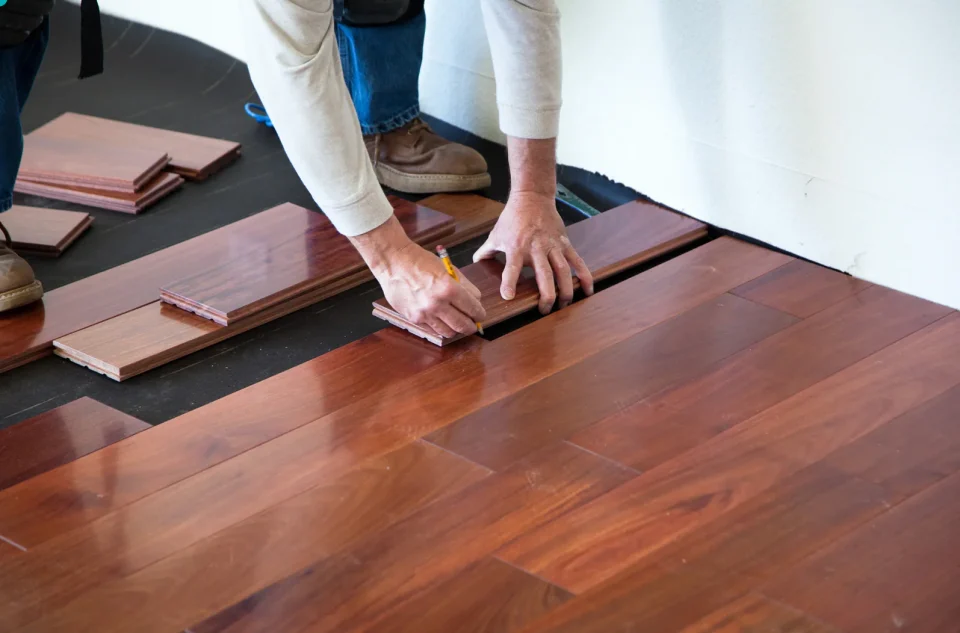
– Hardwood: Classic, warm, and long-lasting, hardwood suits living spaces but needs protection from water.
– Tile: Virtually impervious to moisture, tile is a top pick for bathrooms and kitchens.
– Laminate: Budget-friendly and durable, laminate mimics wood or stone and handles moderate traffic well.
– Vinyl: Soft underfoot, waterproof, and available in endless styles, luxury vinyl plank and tile are surging in popularity.
– Carpet: Plush and inviting, carpet is best for low-traffic, dry areas.
Considering Style, Color, and Texture Preferences
Flooring is the foundation of your design. Do you want rustic oak, sleek gray tile, or bold patterned vinyl? Light tones can make a space feel airy, while dark floors add intimacy. Don’t overlook texture: hand-scraped wood offers character, while polished tile delivers modern shine. Lay out samples in natural light to see how they play with your paint, furniture, and décor.
Budgeting for Your Flooring Project
Setting a budget upfront avoids surprises later. Consider not just the price per square foot, but also underlayment, adhesives, trims, and labor (if you’re not installing it yourself). Factor in a little extra for waste and unexpected hiccups. Quality flooring is an investment, choose the best you can afford for lasting satisfaction.
Preparing for Installation
With your choices locked in, preparation is where your vision starts taking shape.
Measuring Your Space Accurately
Accuracy here saves time and money. Measure each room’s length and width, then multiply for square footage. Add 5 to 10 percent for waste, especially if your space has nooks or irregular shapes. Double-check those numbers before ordering materials.
Removing Old Flooring and Preparing Subfloor
Ripping up old floors can be messy and revealing. Pull up carpet, tile, or wood, then inspect the subfloor underneath. It must be clean, dry, level, and free of damage. Any bumps, dips, or rot should be fixed before moving forward, as an uneven surface can ruin your new installation.
Gathering Tools and Materials Needed
Different flooring types need different tools, but common items include:
– Tape measure
– Utility knife
– Pry bar
– Level
– Underlayment (if required)
– Adhesives or nails
– Spacers and tapping block (for floating floors)
– Safety gear (gloves, goggles, knee pads)
Check the manufacturer’s instructions and gather everything ahead of time to avoid mid-project runs to the store.
Scheduling Installation: DIY vs. Professional Help
Decide honestly: Is this a weekend warrior job or a task for professionals? Simple click-together laminate or vinyl might be DIY-friendly, while intricate tile patterns or solid hardwood could be best left to experts. If you’re hiring, reputable stores like Club Ceramic Ottawa can provide guidance and refer trusted installers in your area.
Step-by-Step Installation Process
The details here depend on your chosen material, but a few universal steps always matter.
Acclimating Flooring Materials to Your Home
Flooring isn’t immune to its environment. Wood, laminate, and some vinyl planks need time to adjust to your home’s temperature and humidity. Leave the materials in the installation room for at least 48 hours (or as recommended) before you begin.
Laying Out the Flooring: Planning the Pattern
Before cutting or gluing anything down, dry-lay the first few rows to plan the pattern and avoid awkward seams. For wood and laminate, stagger the joints for strength and style. For tile, check your chosen layout, straight, diagonal, or herringbone, and mark reference lines with chalk.
Installation Techniques by Flooring Type
– Hardwood or Laminate: Start along the longest, straightest wall. Use spacers for expansion gaps and a tapping block to secure planks.
– Tile: Spread mortar evenly, set tiles carefully, and use spacers for uniform grout lines.
– Vinyl: Peel-and-stick tiles are easy for beginners. For floating planks, lock them together and trim edges as needed.
– Carpet: Stretch wall-to-wall and secure with tack strips.
Always follow the manufacturer’s guidelines for adhesives, fasteners, and curing times.
Finishing Touches: Trims, Moldings, and Clean-Up
With the floor in place, add baseboards, quarter-round, or transition strips for a polished look. Seal grout if installing tile. Sweep or vacuum thoroughly to remove debris. Now’s the time to stand back and admire your handiwork.
Post-Installation Care and Maintenance
Your new floor is in, but the work isn’t over. Routine attention ensures it looks great for years.
Immediate Post-Installation Tips
Give adhesives or grout time to cure fully before moving furniture back. Protect the surface with felt pads under heavy pieces. If you’ve installed wood, keep humidity levels stable to avoid warping.
Routine Cleaning and Upkeep for Longevity
Each flooring type has its own cleaning routine:
– Hardwood: Sweep often and use damp, not wet, mops.
– Tile: Clean grout lines regularly to prevent staining.
– Laminate and Vinyl: Use gentle cleaners; avoid excess water.
– Carpet: Vacuum frequently and address stains promptly.
Set a regular schedule (weekly or as needed) to prevent buildup and preserve appearance.
Troubleshooting Common Flooring Issues
Even the best floors can face challenges:
– Creaking boards: Usually caused by loose planks or subfloor problems.
– Gaps or buckling: Often due to moisture or temperature swings.
– Scratches or dents: Use repair kits for small fixes, and area rugs for prevention.
Address issues early to prevent bigger problems down the line.
When and How to Schedule Repairs or Refinishing
Deep scratches, stains, or significant wear may call for professional help. Hardwood can often be sanded and refinished, while damaged planks or tiles might need replacing. If in doubt, consult with flooring experts to determine the best approach.
—
A great flooring installation is equal parts vision, planning, and execution. By understanding your needs, preparing thoroughly, and caring for your investment, your new floors will be a source of pride for years. And if you ever find yourself weighing options or seeking advice, local resources like Club Ceramic Ottawa can provide expert knowledge and a wide selection to help bring your project to life.